Ultrasonic Sensor with Raspberry Pi
Published
Measuring distances with a Raspberry Pi and HC-SR04 ultrasonic sensor
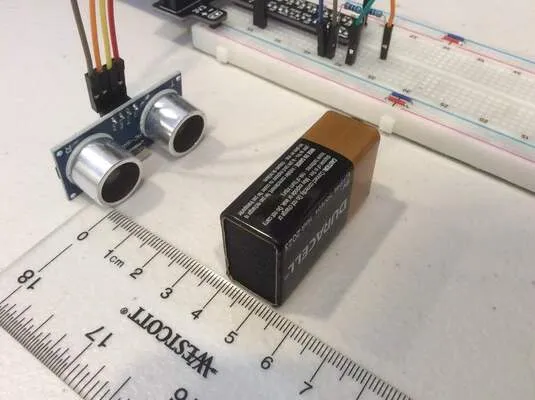
The Ultrasonic Sensor
An ultrasonic sensor is a device that measures distance using sound waves. It emits a sound wave, which bounces off an object in front of the sensor. The sensor measures how long it takes for the sound wave to get back, then converts the reflected sound into an electric signal. Ultrasonic sound waves travel faster than the speed of sound that humans can hear (audible sound). We will be using the HC-SR04 sensor.
An ultrasonic sensor has two main parts: a transmitter (emits sound) and receiver (receives the sound waves which have bounced off the object).
How the HC-SR04 Communicates
The controller starts by sending a 10 µS pulse to the Trigger pin. The transmitter on the sensor fires an 8-cycle sonic burst, which travels at the speed of sound, reflects off an object, and into the sensor’s receiver. The sensor then sends a pulse on the Echo pin proportional to the distance (time it takes for the sound waves to come back).
To calculate the distance from sensor to object (in centimeters), multiply the duration of the pulse by the speed of sound (34,300 cm/s). However, since the sound wave needs to go to the object and back, the output from the Echo pin will be double. Therefore, you also need to divide by 2.
Voltage Divider
The output of the HC-SR04 is 5V, while the Pi’s inputs can only support 3.3V. The output pin cannot be directly connected to the Pi’s GPIO pins. To change the voltage from 5V to 3.3V, we need to use a voltage divider with two resistors with appropriate values.
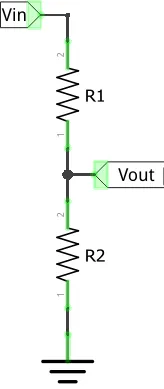
The formula for calculating resistor values is:
With R1 being 330 Ω and R2 being 470 Ω, the equation becomes:
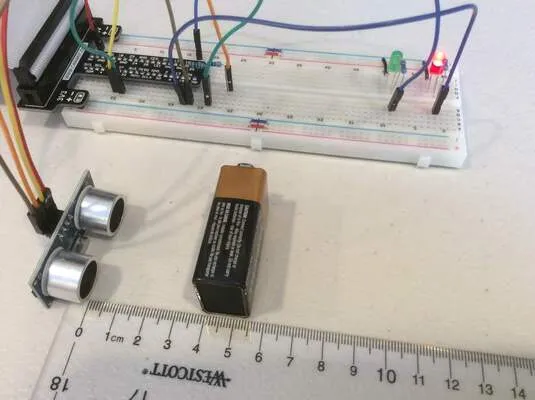
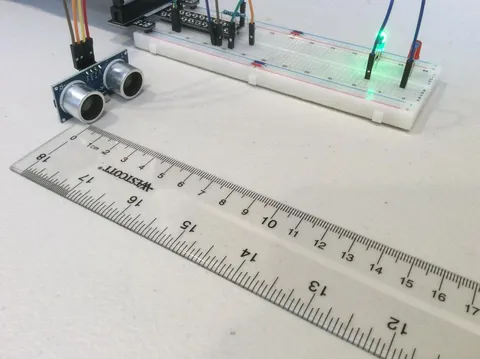
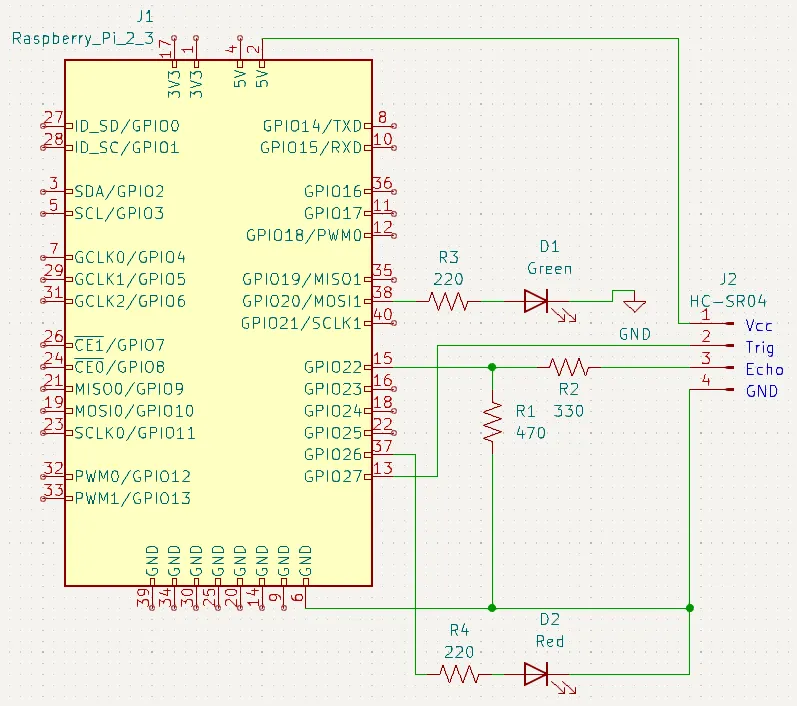
Schematic
In addition to the sensor and voltage divider, this circuit also includes a red and green LED which can be controlled in the code.
Python Code
The following code reads the distance from the ultrasonic sensor and switches LEDs depending on if an object is too close to the sensor.
import RPi.GPIO as GPIO
import time

GPIO.setmode(GPIO.BCM)

# GPIO Pin constants
TRIG_PIN = 27
ECHO_PIN = 22
RED_PIN = 26
GREEN_PIN = 20

# Set GPIO as input/output
GPIO.setup(TRIG_PIN, GPIO.OUT)
GPIO.setup(ECHO_PIN, GPIO.IN)
GPIO.setup(RED_PIN, GPIO.OUT)
GPIO.setup(GREEN_PIN, GPIO.OUT)

def get_distance_cm():
    # Send the 10us Pulse
    GPIO.output(TRIG_PIN, True)
    time.sleep(0.00001)
    GPIO.output(TRIG_PIN, False)

    start_time, stop_time = 0, 0

    # Get the time when echo pin is high (pulse started)
    while GPIO.input(ECHO_PIN) == 0:
        start_time = time.time()

    # Get the time when echo pin is low (pulse ended)
    while GPIO.input(ECHO_PIN) == 1:
        stop_time = time.time()

    # Time difference to find pulse length
    elapsed_time = stop_time - start_time

    # Multiply with the sonic speed (34300 cm/s) and divide by 2
    distance = (elapsed_time * 34300) / 2

    return distance

while True:
    try:
        cm = get_distance_cm()

        if cm < 20:
            # Less than 15cm, red LED on and green LED off
            GPIO.output(RED_PIN, True)
            GPIO.output(GREEN_PIN, False)
        else:
            # Greater than 15cm, red LED off and green LED on
            GPIO.output(RED_PIN, False)
            GPIO.output(GREEN_PIN, True)

        print("Distance: %.1f cm" % cm)
        time.sleep(0.2)

    except KeyboardInterrupt:
        break # CTRL+C to end program

print("Program Stopped")
GPIO.cleanup() # Reset all GPIO